Monday, June 4, 2012

M I N T Y

I have one of those old timey driveways where there is a strip of grass down the middle.  Well, I'm sure the original intent was to have grass there -- I do not.  It's a challenging area to landscape; it gets a bit of hard use - occassional heat from parked car engines, and it's not connected to the sprinkler system.  It was just dirt when I moved in, and I personally had no intention of ever planting grass there.  I do love that it's not a solid concrete driveway though - when given a choice I will always opt for green surface areas versus concrete or asphalt.

Everyone (you know, "everyone") always talks about how invasive mint is.  Over the years I have planted it in areas where it's difficult to get anything else to grow and had success.  Once you get it to take, you are pretty much good to go.  I thought the center of my driveway would be the perfect space for mint - it's contained from spreading too crazily, and it's a hardy plant. 

Overall I've been very pleased with it there.  Originally I planted peppermint, spearmint, and pennyroyal mint.  I learned that pennyroyal won't make it in the summer heat.  The other two - pretty happy.  They (you know, "they") say that you shouldn't mix the types - that they will hybrid themselves - but do I care?  Not particularly.  It all smells quite heavenly wafting up through my car vents when I drive over it, and it's all the same when feet tromp through it and the minty smell floats in the air.  The plants on the front third of the driveway are really happy.  The back two thirds don't get enough sun and it's mostly died there.  I need to figure out something else for that portion.  I have one healthy thyme plant, but it's not exactly doing the job...  I'd love some riverstone and ground cover...

I have a make-your-own garden stone kit - the type where you can make garden stones with words stamped in them.  Last year I made one that says, "minty" and put it at the end of my driveway, near the sidewalk.  I hoped that it would let passersby know that it was mint there, and not weeds.  Should I care about that? Probably not.  Do I?  Well, a little.  And I do like plant labels.

But at some point "minty" cracked in half.  I keep scooting the pieces together, smushing dirt around them to hold them in place - mostly in vain. 


And then I saw this on Pinterest:


http://littlewhitedog-ie.blogspot.com/2011/05/blooming-marvelous-garden-letters.html

And as I turned the image over in my mind, I had an idea.  I know.  I was just as surprised as you are.

I went to several hobby and craft stores, looking for big cardboard letters.  They never had all the letters that I needed at the same time.  I wasn't willing to buy one or two, and then hope that I would someday find the remaining ones I needed; I have enough projects going without buying half the materials needed and to have them lay around the house, waiting.  After several attempts to buy them in a brick and mortar store, I turned to ThirdShift on Etsy.  The owner said they would let me know when they had all the letters in stock, and they did.  In short order I had my letters.  These are 12" inches tall.

http://www.etsy.com/listing/93446926/paper-mache-letter-x-12-tall-ready-to


Next I took a box cutter and cut away one edge of the letters, leaving me with a mold:


(I found zig zagged cardboard inside them for reinforcement.  I pulled that out and threw it away.)  Next I sprayed the cardboard with an aerosol waterproofing spray from my tub of camping supplies.  And then I lined the inside of the letters with aluminum tape for additional protection against moisture, and to give them a little bit of stability.  That took considerably longer than I expected - but I did have a little bit of OCD about it...  : )

Planning to pour concrete into the letters, I cut up coat hangers and bent the pieces around into 3D shapes to use as rebar:


And finally, I mixed up a batch of concrete in my wheelbarrow, and filled the molds with concrete.


I left them dry for 6 days, and then carfully removed them from the molds:


And spray painted them a benign color:


Then I painted over them with some paint that goes on clear, but it supposed to soak up the sun during the day and glow at night, but.... best I could tell, it doesn't glow.  Maybe I didn't put enough on -- I'll try another coat.  But -- they still look great in my driveway bed of mint!


Now... as long as nobody drives on them..  : )


.

Wednesday, May 30, 2012

Planted!

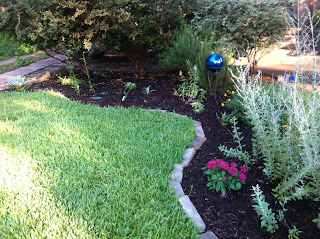
I got my newly expanded front beds planted.  Finally.  Whew - I have to say I am relieved to be at this stage with this project.  It was a doozy.  I'm pleased with the end results though. 

Here is the right side:


The plants are small now, but they will fill in.  I've learned the hard way to let them look sparse at first to allow for growth.  Some of the plants I bought at the semi-annual butterfly plant sale, and some are transplants from the backyard. 

I know that you can't distinguish plants in this photo, but on this side I planted a Butterfly Bush, two Horsemint for a blooming groundcover, 2 types of milkweed, and pentas.  Pentas is an annual, and I am a perennial girl; but the butterflies love it so much that I relented.  It's also pink - which I do not do - but again, to draw butterflies... 

 Already in the bed were Lamb's Ear and Turk's Cap.  Lamb's Ear - I can take it or leave it.  It is a variation in texture, and that's always good to have - but it doesn't really offer anything else.  But it is well established so I left it there.  And then the Turk's Cap; that's the tall green on the far right.  It gets covered in little red blossoms that are loved by hummingbirds.  It was also well established before I moved in, and I'll allow it to thrive.

And here is the left side:

In this front peninsula, my yellow echinacia is finally blooming.  I added two milkweek in the right hand corner, and a type of daisy in the front left corner.  The daisy is dead - but I'm leaving it there for now in hopes that it drops seeds.  Along the front edge I have planted poppy seeds that a friend collected for me.  I have tried to grow poppies before with dismal results, so I am hoping this time I have better luck.  The bright green large plant that you see is a Flame Acanthus and it will have a ton of red blossoms for the hummingbirds.  You can see the frosty Artesmisia poking out on the right hand side.  Hidden from view entirely are fennel, Butterfly Weed, Cosmos, Calendula and a yellow daisy whose name escapes me...


Moving up the edge of the bed, just a red pentas there that is new.  It's alongside Russian Sage


And then turning the corner...

Left to right I have another Horsemint groundcover (it's cut off in the photo).  Then an agave plant.  This was in a pot but I knew the pot was too small.  There was no way to get it out of the pot and leave the pot intact, so I hit the pot with a hammer and split it in half.  The agave had started a few new plants in the pot and I separated those out.  I planted the larger 3 in this bed, and planted several tiny shoots in the backyard beds.

Next are some onion chives from a neighbor (planted those this morning!) 3 Goldenrod, one Pacific Daisy (fall blooming) another agave, two Rattlesnack Masters (a succulent that blooms) and a purple blooming Lemon Bee Balm (Monarda Citriodora) that  blooms purple.  It's blooming, but it's hard to see in this photo.


So what remains on this project?  I have some seeds to put out on the left side - marigolds, for the remaining portion of my marigold seed trial that I am participating in; Dill, and .... others, but I can't remember sitting here now what they are.

For the right hand side, I need to switch out the mulch around the tree to match the rest of the bed.  I need to re-do the fountain* reservoir  dig up and repair some sprinkler heads, and did up the spigot to repair the leak.  None of those sound like much fun, but all of them need to happen...

* Long post, coming soon...
.

Honeysuckle for Privacy

Did I tell you the honeysuckle plant on my first privacy trellis bit the dust?  And that I had a bit of a "dust up" with the nursery from whom I bought it?  It's too long of an uninteresting story of frustration that I prefer to leave behind, so suffice it to say that I had to go buy another honeysuckle.  I did not return to the same nursery...

So the new one looks like it is going to have both yellow and coral blossoms on it - I swear I saw both on it when I bought it.  That would be really cool.  I planted it on Sunday, and re-strung the lines that I had to cut to pull out the old honeysuckle.

Here it is in place:

It's sort of hard to distinguish it from the shrub behind it...


And here it is, between the poles.  The wires (fishline) are blissfully invisible.  Blissful, that is, until you forget they are there, and you almost walk into them.  Not that that has happened to me, but it could be cautionary tale.


It's gotten a late start compared to the passion flower vine, but I have high hopes.  It gets great morning sun.  I looked at it this morning, and it looks like its getting ready to put out a bunch of new blossoms.  Happy.


.

Gulf Fritillary

On my morning garden walk today I went to check on my privacy trellises.  Every few days I like to check the vines and encourage the little tendrils to reach up to the next row of wire.  This morning on my passion flower vine I spotted two caterpillars!


I looked them up in my butterfly reference book* and found out they are the Gulf Fritillary caterpillar, which dines on the passion flower blossoms. (I think that even though the shades of orange are a little different, they are both the same type, just at different maturities. I "think.")   I also found a photo in the book of what the butterfly egg looks like, and went back outside to see if I could see any one the vine.  Yes!  I snapped a few photos, but they are too tiny to photograph.

Here's what it will look like as a butterfly:


I love that the butterflies have found this plant already - they were one of the the reasons I chose that plant.  Happy.

* Here's the book I have:  http://www.amazon.com/The-Life-Cycles-Butterflies-Maturity/dp/1580176178/ref=sr_1_1?s=books&ie=UTF8&qid=1338393078&sr=1-1#_

.

Tuesday, May 29, 2012

Privacy Trellis - It's Growing!

Hi!  I just wanted to show you how the privacy trellis vine growth is coming along.... the passion vine is really happy!


The vines are already almost as high up the wires as I am tall!  I do love it when a plan comes together.


How did we get here? Read the four prior posts on this project:

April 2nd
http://my1929tudor.blogspot.com/2012/04/privacy-trellis-construction-begins.html


April 2nd:
http://my1929tudor.blogspot.com/2012/04/trellis-post-caps.html


April 24th:
http://www.my1929tudor.blogspot.com/2012/04/sideyard-privacy-trellis-project-done.html


April 17th:
http://www.my1929tudor.blogspot.com/2012/04/privacy-trellis-progress-update.html


I had to replant the honeysuckle, and re-string the lines for it - I got that done on Sunday.  Another post...